Monday, September 10, 2007

Seven Ways to Get Happy & Stay Happy

I came across a website alittlenews.wordpress.com. A blog site from a small town newspaper photojournalist for 17 years. Gary Cosby, Jr. dreamed of becoming a photographer for the THE NATIONAL GEOGRAPHIC as a young photojournalist.

He started his blog just a couple of months ago, and its quickly gaining popularity. Ive had the chance to read his "Seven Ways To Get Happy And Stay Happy!" Article which actually helps all of us struggling photojournalists find inner peace and improve our skills along the way.

He humbly admits that some of his pictures are results of having found a blog about off camera lighting. Which blog? Strobist.com of course, the mother of off camera lighting ran by Mr. David Hobby.

Here's a summary of his article. Seven Ways to Get Happy & Stay Happy:

1) Work For Yourself. When you are happy with your own work, others will like it too.
2) Dont’ Worry, Be Happy - Focus on your work, not on things that are beyond your control.
3) Whistle while you work. A good attitude means more than good photos.
4) Be an educator rather than a complainer.
5) Every day, every assignment, push yourself to get better.
6) Be a proactive member of your newsroom.
7) Stand on your head. It will give you a different perspective from the everyone else.


Wednesday, September 5, 2007

Strobist Seattle Meetups Video

Seattle strobist meetup group has been very active in response to the Florida meetup that garnered nearly 50,000 views a few months ago. This time they came out with a video of what transpired during their meet. I cant wait to participate in such an event in my area, which Im anticipating won't be too long now.

This video is worth watching.Checkout what happened to Panda!

Find your meetup groups in Flickr.com

http://www.flickr.com/search/groups/?q=meetup&m=discuss&w=71917374%40N00&s=act


Checkout the official link of Seattle Strobist Flickrites

Related Articles:
Florida Meetups Photography Session

Tuesday, August 28, 2007

DIY Photography - A Better Bounce Card

I have tried most DIY bounce cards. Purchased and used a few, like gary fong's lightsphere, stofen omni-bounce, etc. None of them struck me more than this ABBC (A Better Bounce Card) DIY tutorial video.

You owe it to yourself to try it.

You Can Learn How To Make A Better Bounce Card!!!! Do it yourself . . . FREE. Watch the Free Learning Video!!!


Monday, August 27, 2007

Gothic Photoshop Photography Effect

brendan.oshea Flickr Pro User was kind enough to share the photo retouching secret to this gothic effect look in photoshop by using Unsharp Mask tool and overlay blend mode technique.

Here is what Brendan.Oshea had to say about this method:

I've done this on a few of my other photos Jimmy, and I've documented the process in one of the shots I've posted previously. It involves cranking up the radius slider in unsharp mask more than the amount slider. (opposite of what you'd usually do) desaturate a little, then repeat until it starts to look too silly.

Sometimes I'll get one of the channels, paste it into a layer and use overlay mode to desaturate. Depends on the image.

To tell the truth, I usually only use this technique when I want to hide technical flaws. Unfortunately, I use this technique alot. The lighting is critical though, and it just doesn't work unless I use this particular style of lighting.

Single Sunpak 383 Super on full power, newly acquired shoot thru 28" umbrella, triggered with Elinchrom Skyport.

Gothic Unsharp Mask Photoshop effect

Im in search of the Manny Librodo photoshop retouching technique, and this might be one of the secret ingredients as to how Manny comes up with his stunning photoshop effects. Manny is smooth and subtle when it comes to photoshop effects, and this is more deliberate, but effective. I'll talk more about my Idol in the upcoming articles... I can't wait!

Sunday, August 26, 2007

Fake Wind Tunnel Photography Effect

I ran across this cool photography effect on Flickr.com, im sorry I forgot who took this picture, I will surely come back and update it as soon as I find it again.

Very cool "light painting" technique.
Here is an excerpt on how this artist came up with this awesome shot.

This was harder to do than I expected. I wanted to follow the contours of the car more closely, to make it look like the smoke you see in a windtunnel. But that was too slow, and I had to run back and forth pretty quickly, making the streak a little "bumpy." A longer exposure would work well, but my driveway is too bright for that.

Double exposure created in camera:

1) 13 seconds for lighting the car: large softbox to left of camera, White Lightning X-1600, 3 pops at 1/4 power + handheld SB-600 at 1/4 power to light rear of car. Also, the streetlight to camera right is contributing more than I wanted, giving the right side of the car a yellow cast and lighting the background.

2) 30 seconds for the fake "windtunnel smoke" -- created with a Fenix P1D LED flashlight on low power, and me running back and forth as fast as possible

Inspiration is from this image
http://www.flickr.com/photos/51035610542@N01/28201733/


Fake Windtunnel Light Painting Effect

Friday, August 24, 2007

(RED) Annie Leibovitz - Vanity Fair

Annie does it again! How many times have we seen her photograph world leaders and icons, and stretching the boundaries to produce incredible pictures everytime. She keeps amazing us with her ability to choreograph her subjects and lighting scene (with the help of a million assistants) in a very limited time.


Vanity Fair July Issue features (Red), an awareness campaign which seeks to benefit the people of Africa by donating a portion of the money, when we buy (red) designated items. I saw the youtube video and can't help but share it to the readers and also inspire to help aid the people of Africa through (red).


Enjoy this video and try to study the lighting scenario she designed.

Thursday, August 23, 2007

GBTimelapse and a Canon DSLR

This is "News to me"! This video came out a good 3 months ago (May 19th, 2007), but I just saw the time lapse video and it looks amazing. I guess you'll have to see it for yourself to believe it. This software, GBTimelapse is available to Canon DSLR owners only. Im sure they'll market it for all DSLR soon.


Wednesday, August 22, 2007

Nikon D3 and D300 Digital SLR Specs & Video

Finally! Something to cheer about for my fellow Nikonians. The new Nikon D3 has been announced, and you can checkout the video of the sassy new Nikon D3 Digital SLR. With hopes of meeting of exceeding the Canon EOS-1D Mark III in high ISO image quality, im very optimistic. Its said that it definitely produces cleaner images at high ISO over its predecessor the Nikon D2Xs.

In addition to the FX format (Full-frame) D3 Nikon has also announced the new DX format D300 which also features a 12 megapixel CMOS sensor. The D300 will be available in November. My favorite site to read about the specs and features is DPreview.com
http://www.dpreview.com/news/0708/07082313nikond300.asp

Here's the DPreview page of the New Nikon D3. http://www.dpreview.com/news/0708/07082312nikond3.asp

Checkout the video of this new Nikon D3. Looks like a tank, and its being described as rugged and heavy. We'll just have to wait and see how it competes with its competitor, the Canon 1D Mark III.


Checkout this Nikon global special site that features the new Nikon D300 and the Nikon D3. Sweet Patunias! http://nikonimaging.com/global/twoflagships/index.htm?cid=IJD78BJZIJ0

Here is the Official Nikon D3 Specs PDF. http://chsv.nikonimaging.com/global/products/digitalcamera/slr/d3/pdf/d3_2p.pdf

Sunday, August 19, 2007

Photography Meet-Ups

Photography Meet-Up in Florida? I have been wondering all this time, how an event like this can be put together? Thousands of aspiring photographers and professionals flock to join such an event. I bow down to those that were able to successfully organize an event like this.

Nicholaus Haskins came up with this idea in Florida Park. Im drooling over this, thinking how valuable the experience could have been if I was there watching how these pictures were molded, and what tools were used to light the scene.

Nick Haskins TTD
Florida Park Photography Meet-UpMore great Shots

Looks like everyone who participated has a smile on their face! Well at least we get to see the "Behind-the-Scene" shots.

Strobists in Action
Florida Meet-Up Participants

Here is the link to their FLICKR site:
http://www.flickr.com/groups/strobistmeet/pool/

And the site of the brilliant organizer that made this happen Nick Haskins:
http://www.nicholaushaskins.com/2007/08/tiffany-and-mike-get-trashed.html

Saturday, August 18, 2007

Who is Phil Ratio?

Check this site out for your self, from popphoto.com , includes a great PDF explaing all about fill ratios. If you have been playing outside with your flash lately, you'll notice that you can get stunning effects if you meter for the sky (or background) and fill the subject with flash. 1:3 fill ratio is the magic ratio. But rules are made to be broken, so keep firing that strobe and you'll soon get the hang of it. Ratios will depend on how you want to project the final outcome.

DONT FORGET TO DOWNLOAD THE PDF. Cheers!
http://www.popphoto.com/article.asp?section_id=4&article_id=706

Friday, August 17, 2007

Trash the Dress Photography Sessions

Wow! Im blown away! That certainly shows how clueless I am about wedding photography. I thought Matt Adcock & Sol Tamargo was the pioneer of this "Trash the Dress" session, only the find out that there is a blog all about trashing the bride's dress on wordpress.com

http://trashthedress.wordpress.com


Thursday, August 16, 2007

Florida Nature Photographer - John Moran

John Moran - Florida Nature Photographer
John uses unconventional setups to create a spectacular shot of the fireflies on the Ichetucknee.

His setup involves:

• Stobe on a boom, for water sparkles.
• Continuous light, for scene painting.
• Custom-made black box to emulate the blinking of an amorous female firefly

Visit his website at http://www.johnmoranphoto.com


Here's the fruits of his creativity. Phew!

Wednesday, August 15, 2007

Photo Retouching Expert

You got to see the before and after shots of these models, celebrities and actors/actresses.

Here is a retouch the struck me the most. Awesome job!

Britany Murphy Before Retouch

AFTER RETOUCHING

Britany Murphy After Retouching

http://www.iwanexstudio.com

Note, that iWanex Studio doesn't claim ownership to any of the pictures. (Obviously, copyrighted to their photographers). ONLY the retouching of each photo is copyrighted to them.

Tuesday, August 14, 2007

Canon vs Nikon Digital SLR Cameras

Here we go again! I hate opinionated and biased answers from pros and amateurs alike, but we all would like to know WHY you like your SLR camera.

Well after getting input from professional photographers, we are still unsure which one is the best! But I hope that these insights will help you choose the right path.

Why Canon?

1. Less noise when using ISO 1600 - 3200 compared to Nikons.
2. Dedication from Canon over the last years, they always have new equipment one after the other.
3. Array of professional lenses that are available for the consumer.

Why Nikon?

1. Built and feel is better than Canon bodies. (IMO depends on the user)
2. Fast and accurate focusing under low light conditions.
3. CLS (creative lighting system) with Nikon's Speedlight flashes.
4. Noise looks more like film grain unlike Canons.
5. Better and more superior glass and better QC, compared to its counter-part.

There you have it, i'll keep it updated as soon as I hear more positive or negative comments.

In my opinion, Its best to have both. Use Canons on low, natural light situations because of the noise situation with Nikons. Use Nikons when you'll be using flash. Of course, you can't always get the best of both worlds, especially in my case.

Bottom-line is that your clients wants to see your results. None of it is going to matter, unless you have the pictures to prove it.

Sunday, August 12, 2007

www.planetneil.com

I was browsing on one of the sites and I came across a link on how to use flash effectively. This site talks about how to balance ambient light with flash light, how to make it flash, not look like flash. We all agree that light coming from a strobe looks artificial. Try to read through this site and it will greatly improve your ability to work with your flash.

http://www.planetneil.com

Cheers!

Friday, August 10, 2007

Photoshop Smart Saturation Technique

The right way to increase saturation on your images? Well there's a boat load of tutorials on this, but this one pops out among the rest. Give it a try and you'll see what i mean.

Steps to increase saturation in photoshop:

1. Duplicate the image.
2. Gaussian Blur slightly to avoid color fringing when you increase saturation later.
3. Change BLEND MODE TO COLOR on this new layer.
4. Apply the hue/saturation ADJUSTMENT layer.

Thats it! Not to shabby ay? Well if you hardly noticed any difference then, I suggest you disregard this tutorial. I surely think its cool.

Thursday, August 9, 2007

Photoshop Color Correcting Color Casts

This I have to try. But unfortunately only works on really bad color cast images.

Steps to correct color on images with color casts:

1. Duplicate the image.
2. Invert the image. IMAGE > ADJUSTMENTS > INVERT
3. Set the BLEND MODE TO COLOR on this inverted layer.

Ta da! ... Let me know if it works.

Wednesday, August 8, 2007

Photoshop Soft Effect with Blur, History Brush and Blend modes

Here's a really neat unconventional way of softening portraits using Gausian blur of course, history brush and blend modes. Tutorial method taken from www.eddietapp.com.

Lets get started:

1. Gaussian blur the image.
2. Take a History Snapshot (New Snapshot Icon)
3. Undo the Gaussian blur. (yes, trust me on this)
4. Select the History Brush tool with Blend mode to DARKEN (10% OPACITY)
5. Set history source to the new snapshot.
6. Use the history brush to apply a foundation on the face and neck.
7. Set blend mode to LIGHTEN (10% OPACITY) and do the same.

TO APPLY OVERAL SOFTNESS:

1. You can choose to FILL and select history in the contents menu. (BLEND MODE TO LIGHTEN) and start at 50%.

2. Repeat the history fill, but this time BLEND MODE TO DARKEN, and start with half the opacity (25%).

Tuesday, August 7, 2007

Wedding Photography Guide

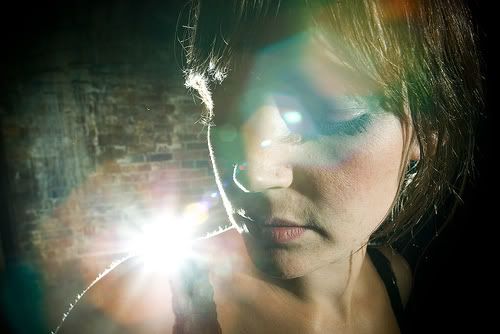
Drama is the responsibility of the photographer.

Where to find customers:

Theres plenty of resources to find customers. You can start by having your friends recommend you, advertise in local newspapers, printers, bridal shops and suit rental places, florists, beauty solons and the list goes on. You have plenty of time for the wedding, so don't rush into it. Get an appointment book or scheduler.

Presentation:

What you present to the client is very important. Present the whole package from the start all the way to the thank you cards after the wedding in a well lit location for them to get the feel of the whole package. Some of the stuff you will be presenting are stuff the bride is unaware of, until you presented it. Its very important to sell the whole package and not just your photography skills.

The Complete Service:

1. Studio sessions and poses are taken for publicity purposes.
2. Wedding Ceremonies - Photographer takes the entire wedding day from start to finish, and checking his/her "pose" checklist to make sure that they are taken.
3. Wedding album

Shooting the wedding:

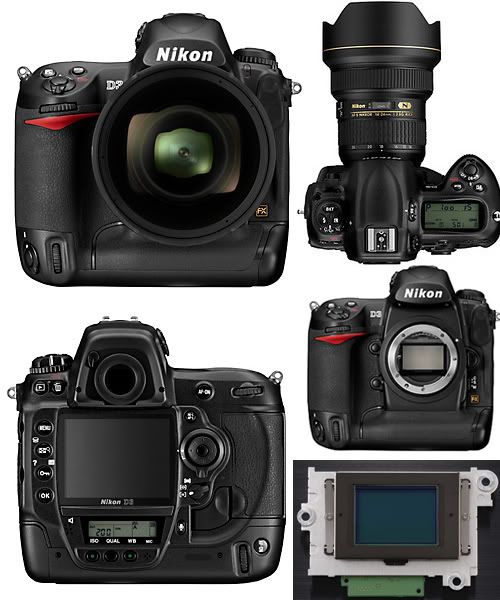
What you need to do is bring a big camera. You need to look professional and there's no way you are going to look like a pro with a tiny SLR camera. Thats the public's concept of a professional photographer, undoubtedly. Aside from the basics, here are some items most photographers will be needing to shoot weddings.

1. Exposure Gray Card - Make sure to attach a white sticker to help in the color balancing.
2. Flash light - Very important for dim lit situations and checking your camera settings, if your camera doesn't come with an lcd light.

Wedding Photography Scenarios:

Bride Preparing for the ceremony.

1. Bride informal without veil having her hair done.
2. Bride pinning corsage on her mother.
3. Bride adjusting father's tie.
4. Bride displaying bridal garter.
5. Bride looking out of the window (best in natural light)
6. Bride Formal pose together with mother and father.
7. Tableau: Bride with Maids and Flower girls.
8. Bride leaving the house and in the car.
9. Bride coming out of the car and entering the church steps.

Ceremony (Catholic Ritual)

1. Processional: Ushers and Grooms.
2. Groom seeing the bride for the first time in church.
3. Ceremony Proper.
4. Bride and Groom kneeling.
5. I do's and the First Kiss.

Ceremony (Jewish)

You need to be fast on these four shots

1. Lifting the veil.
2. Breaking the wine glass wrapped in towel.
3. Kissing of the bride and groom.
4. Toasting for best wishes.

Post Ceremony

1. Bridal Group at the altar.
2. Recessional. Bride on the groom's right arm.
3. Kiss at the end of the aisle.
4. Entire bridal party on the steps of the church.
5. Rice Throwing, leaving the church.
6. Rear window view of the couple leaving.

Reception

1. Bride and groom entering the room.
2. Couples First Dance.
3. Bride dancing with father.
4. Groom dancing with mother.
5. Take a picture with the Bride on every table if possible.

Dinner

1. Jewish - breaking of the bread starts dinner.
2. Drinking with interlocked arms.
3. Bride feeding the groom.
4. The couple toasting.
5. Best man toasting bride and groom.
6. Brothers and sisters behind bride and groom.
7. Bride and groom with bride's family.
8. Bride and groom with groom's family.
9. Bride showing ring to friends.
You can also take "Gag Shots" like Dad displaying he's broke (empty pockets).

Extras

1. Bouquet throwing
2. Garter throwing.
3. Peeking behind the door.
4. Leaving the room, entering the car.
5. Guests signing the guest book.

Monday, August 6, 2007

The "Starving Student" Off-Camera Light Kit

http://strobist.blogspot.com/2006/05/round-up-starving-student-off-camera.html


These items are cheap after I looked around on the net. I'll take some pictures of my equipment as soon as I get it. For now I have managed to use SU-4 mode on my sb-800 speedlight.


For those of you unfamiliar with SU-4 mode on SB-800 speedlights. Its a way to fire your strobes using infrared coming out of your camera's pop-up flash. You can use an SLR or any point-and-shoot camera for this matter.


What I try to do is adjust the camera's pop-up flash to TTL with the least amount of light coming out. In my case (Nikon D50) its negative 3 (-3). This allows me to shoot with minimal light coming from my camera's flash, but still fire the infrared to trigger the speedlight.


Since D50's don't have commanders built-in, I had to rely on the SU-4 mode which allows infrared to trigger the flash. Without this option, it leaves me no choice but to run a sync cable, purchase additional speedlights or upgrade my camera.


With this setup im able to partake in some of the exercises on strobist.blogspot.com. This is great! I was thinking of purchasing continous light sets. But after sucking up these information, I have concluded that this is way better and mobile. Cheers!

Sunday, August 5, 2007

Strobist.blogspot.com

I purchased my handy-dandy SB-800 over a year ago, and I haven't been this excited since i was 9 on the eve of Christmas. I heard about strobist a long time ago. I was thinking its just another blog, who cares, I'll surely stumble upon a better site soon.


Well I checked it out after looking around to check out some DIY photography lighting setups. I have to say that this is the ultimate site for photographers like me, who own equipment and never had the chance to tailor their flashing skills. (Opps, sounds like Mardi Gras).


Hands down, strobist.blogspot.com is an awesome site, and they also have a flickr site to show case their honed skills. I'm certainly hooked! I'll probably spending more time on this site than any other site for a month.


Im excited. Got up early on a Sunday morning (7AM) Ive recharged 3 sets of batteries, took test shots of Build-a-Bear stuff toys (not mine), created Gobos and ordered umbrellas. And its only 9:30AM.

Saturday, August 4, 2007

DIY Photography

Why purchase, when you can create it yourself for a lot less? Start-up photographers should really think about alternative solutions before purchasing photography equipment right away. If you inherited a lot of money and starting out as a photographer, then be my guest! But most of us who want to tap into this photography sickness, don't have a lot of money to burn.


Bare Necessities:

1. SLR Camera

2. Lens (prime or zoom lens)

3. Curiousity


DIY (Do-It-Yourself) Equipments:

1. Lighting

2. Back drops

3. Soft boxes (for product shoot)

4. Reflectors

and the list goes on!


Great sites that offer step-by-step instructions are, http://diyphotography.net, http://diynetwork.com, http://strobist.com.


Thursday, August 2, 2007

Justine Ungaro Photographer

I was looking for gigs Craigslist to showcase my ever-growing ability (or sickness). I don't know how I got to myspace.com, but i found a brilliant photographer by the name of Justine Ungaro. Great photos, one after another. I just had to post a little article about her.

Justine Ungaro

Here she is with her award winning photos. Very talented photographer which goes really well with her striking good looks.


Picture Perfect - Fairfax Connection